Feb 28, 2010

Saint David's day crafts

Yes, you heard me! Not Saint Patrick's day crafts. Saint David's Day! or "Dydd Gŵyl Dewi Sant" in Welsh, because 1st March is Saint David's day and Saint David is the patron saint of Wales.

Not a lot of folk that I bump into out here in the US have a clue where Wales is, let alone who it's patron saint is, so here's an obscure cultural right hook for ya! I'm not about to have a "patron saint-off" with the Paddy fans, but thought it'd be nice to give Dewi a look in, as he's often sidelined due to not being sponsored by Guiness.

My family is from South Wales (Merthyr and Aberfan). I grew up in Brecon until I was six and then we moved to North Wales and I lived near Conwy until I went to university. My husband is from further into the hills. He's from a little town outside Caernarfon. Both our kids have Welsh names and we go back as often as we can afford, to visit our family, who still live there.

Wales is a truely beautiful place. So much so that in the Welsh language we have the word "Hiraeth", which has no literal translation into English, but means something along the lines of a deep heartfelt longing for the homeland, a kind of homesickness to your bones. Here are a few photos I took last time we were visiting, to give you an idea of the breathtaking landscape. Yes there are sheep and castles everywhere.
Here's a picture of me aged five looking uncertain about the Welsh national costume that my mum made for me (yes, we wore those to school on St David's day, some of us with a whole leek pinned to our chest!)

And here's a member of the Welsh mafia rocking the national costume outside Conwy's smallest house. Dig the shades!

So, for some nice Saint David's day crafts, we decided to make some kitchen paper and string leeks for the play kitchen (leeks are a national emblem for Wales), and some paper cup and doily welsh hats for the girl's dolls to wear, plus a few little welsh flags, because Wales has the coolest flag ever.

Kitchen Paper Leeks

These were easy peasy. Just paper towel, and string for the roots.

Fold your kitchen paper in half and snip sections half way down it to make the leaves of the leek.

Then fold it in half again and roll it up into a leek shape.

Pop a bit of tape on to hold it shut.

Cut some string pieces for roots and tie them on the bottom of the leek.

Then paint the leaves with watered down green food colouring.

Hang them up to dry upside down.

perfect play food for a pretend kitchen.


Paper cup Welsh Hats.

Welsh hats are a funny looking kind of amalgamation of stovepipe hats and pilgrim hats.

These were extremely cheap and cheerful too, because I had the paper cups and mini doilies on hand. just cut circles of card for the brim of the hat, and then a hole in the middle that is just smaller than the lip of the cup, so that the card will sit snuggly on the cup.

Glue it down.

Let the kids paint them up with black paint (original Welsh hats were black silk)

Once they have dried off, glue a doily underneath.

Then tear out the center of the doily once the glue is set.


Welsh flags

This is the lovely exciting Welsh flag, with a great big red dragon! Love it! Coolest flag ever. Here's a link to the Wiki commons file that you can use to print your own.

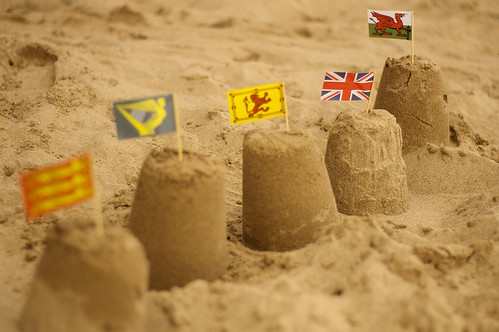
I just printed out a few in line art for the kids to colour and glue to wooden BBQ skewers. These remind me so much of the ones we used to get in little seaside sets of sand castle flags like these when we were kids.


All the dollies are dressed up ready for 1st March. We added a couple of little red shawls made from dollar store paper napkins that were left over from a birthday party.

Even Lola and Upsie Daisy.

If you want some ideas for Welsh foods that you could cook up for St David's day, then Bara Brith and Welsh Cakes are very yum. Our national dish is Welsh Rarebit (glorified cheese on toast)

Usually classes make egg carton daffodils like these for Saint David's day too, but we didn't have any egg cartons handy.

If you'd like to make a castle like many of those found across North Wales, here's a post from a while back, where we made one out of toilet roll tubes. It's not very patriotic though really, because most of those castles were built by the English when they were busy kicking our asses in the Middle Ages.

Anyhoo, before you all get carried away with Leprechauns and shamrock...
Happy Saint David's Day!

Feb 18, 2010

Sewing and embroidery for kids with dollar store shelf liner


I like to hand sew things, and ever since the kids were old enough to notice me sewing, they have wanted to have at it. When they were really little I put together a toddler sewing kit, which I blogged about here. It was very basic with large lacing cards and beads. They loved it for quite some time, but now they are kind of over it. It was good for two and three year olds, but now that they are five and nearly four they want something a little more involved and more like the real deal.

I spotted a particular type of shelf liner in rolls in the Dollar Tree last week and on closer inspection it was the perfect material for learning to sew with.


I mean REALLY perfect. Here's why...

  • It's cheeeeap. You get a nice few feet of it for a dollar.


  • It's flexible but not flimsy or easy to tear.


  • It's got somewhat irregular holes in it, so it's not limiting in the same way as counted cross stitch material or plastic canvas.


  • It's made of an almost spongy plasticy foam type material, so the holes stretch as the big kid friendly needle goes through them.


  • The holes are big enough and plentiful enough that the kids can easily see their hands on the other side of the material when they are pushing the needle up from underneath (this is a big deal, because at five years old, my daughter would have become frustrated if the needle wasn't coming up where she wanted it to)


See! It's made for the job! All I had to do was cut a load of lengths of various coloured yarn and find some big beefy blunt needles.


The needles I got were from Jo-Ann craft store and were two in a pack for $1.29. Really chunky, with big eye holes for easy threading and very blunt.


For a first shot at sewing I drew out lines of rainbow colours on a piece of the shelf liner in appropriate coloured sharpie permanent markers.


My older daughter then sat carefully sewing in each colour in a running stitch. She really got into it and obviously felt that she was doing something very grown up. She really surprised me with how neatly she sewed it. I was expecting something much less precise as a first attempt. I just helped my younger daughter to play around with the sewing stuff in a less structured way because she isn't quite dexterous enough to complete something like the rainbow alone yet.


I was quite surprised as to how patient my five year old was with this. Here's her finished embroidery...


She wanted to do more, so I thought I should try her with something a little more complicated. This time I drew out each stitch in sharpie for a bunch of flowers for her. She kept going at that for another half an hour. It's tucked away in the new sewing box for her to take up again when she's ready.


One issue we had with even the big needles was that the yarn would fray and be difficult to thread into the needle. I put together a giant needle threader with a lollypop stick, a pipecleaner and some electrical tape. My daughters had never seen one of these before, so they were really impressed that you could use it to thread the needles in such a quick easy way.


So here's our updated, bigger kid sewing box ready to be opened up again when they want to sew along with me. I like this set up as a half way between toddler lacing and proper material and sharp needles, because it allows the kids some extra autonomy, as I don't have to supervise as closely as I would with sharp needles. I'm more on call for help trouble shooting than being a guard on duty and they like that as much as I do.


The Dollar Tree also had the shelf liner in blue, black and green, so I'll be picking up more. Next is to explore adding the pony beads as they sew...


As they get older we can explore sewing pieces of the material together and I bet before too long my older daughter will be able to deal with some basic embroidery stitches like chain stitch.

We didn't have an embroidery hoop, but if you do have one, that would make this even easier for the kids to manage.

Feb 10, 2010

Mini roses from dollar store crepe paper streamers


Gonna show you how to make these, because there's still enough time before Valentine's day, and also Heather from Dollar Store Crafts is having a link party and all you need to make these is crepe paper streamers that the Dollar Store sells in packs of two. No glue, no tape, none of that nonsense, just crepe paper and opposable thumbs.


When I was about ten years old, we had our village's first summer festival, where one girl from the local primary school got to be the carnival queen. I didn't go up to audition for the role, because I'm kind of phobic of that sort of thing, in fact there were only a handful of girls in our school that were the right age to apply. My classmate Nyree won the job and her family set about preparing costumes and decorations for the event. She was going to be driven down the highstreet on the bonnet of a car in a hunormous dress. We decorated the car ALL OVER with roses that all the girls spent hours twisting out of lengths of white and pink bog roll! Fantastic! I wish I had a photo to show you!

I thought it would be cool to try and make those roses again, but this time with dollar store crepe paper, so that I could also do stems and leaves and hopefully manage the whole thing without any need for glue or fiddling about cutting shapes like most paper flowers require.


At the Dollar Tree by us, you can get two rolls of crepe paper streamers in a bag for, you guessed it, a dollar. I picked up red, white, pink, yellow and green. Those seemed like rose kinda colours.


Here are some pics of the roses that I made.


I thought about doing a photo tutorial for this, but it wouldn't be as straightforward as if I just shot a video of me making one for you. Unfortunately as video tutorials go, this one is a little chaotic. It's full of five year old, and narrated by croaky the frogwoman (I lost my voice over the weekend) Anywhoo, once you get past being bossed around by my older daughter (who clearly is better suited to giving tutorials than I am) and can deal with the fact that my three year old announces an ant infiltration of our kitchen in the middle of it, hopefully you'll be able to see how I make these roses. They are easy and quick and really cute. Here tis...


Just for Heather, here's a pic of some in a Dollar Store salt shaker ;) They really are quite teeny. I wonder if you can get wider crepe paper streamers from anywhere to make full size roses.


Also, they are a really good way of recycling torn up wrapping paper. A ripped strip of wrapping paper can be twisted into a rose really quickly and used to decorate another gift.


So go have a peek at the other links in Heather's DSC link party, because Heather is lovely, and DSC is a happy place of makey fun! Hope you enjoy making some crepe paper roses. My kids like to hoard them in their play kitchen :)