
It was very cheap and easy! Plus there's a funny little bonus craft at the end, made from the left overs. I'm sure people that know me in the offline world will find it hilarious that I, with my yoghurt splattered walls am writing for a site called Alpha Mom! One of my mate's kids actually said about our place last week "Can we go round to the messy house?"
I want to take this opportunity to link to a number of people that have tried the projects posted on Filth Wizardry and blogged about it themselves. So many lovely new versions of our crafts springing up around the world makes me a very happy bunny. Thank you to anyone that got in touch to either show me their own versions, or point me to other people's versions that they had seen.
- Over at Historias de Iraides they had a go at our print out and colour fairy wings from last year. You can see them here.
- Ali at "found in the Ali" made her own no sew top, and used our iron on plastic bag decals to adorn it. Pretty darn cute!
- Bea's crowd over at "All join in" had a go at our Lego hole punch dioramas here. The Sir Topham Hat is by far my favourite! Kid drawings rule!
- Sari's little girls did a cracking job on our tin foil toadstool ring, here at her blog "Two Little Girls". Love the black and white photos with the coloured toadstools!
- Crystal's family over at "Easy Stay at Home Fun", used our print, colour and cut reef creatures to make their own version of our coral reef livingroom wall, here.
- Wonder Mom and "The Fantastic Five" had a go at our balloon and torch lightsabers for a bit of light painting photography here.
- Over at Sternchen Design, they made the cutest little tshirt using our iron on plastic bag method, here.
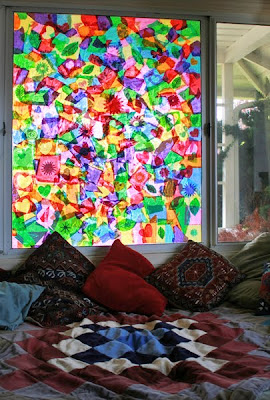
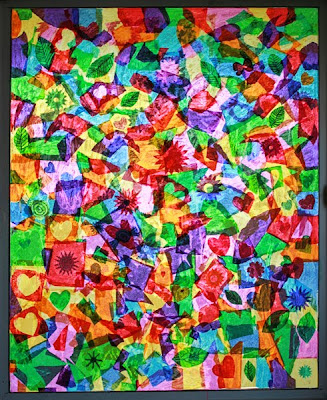
- The crew over at "This girl love to talk" made their own version of our stained glass tissue paper and glue window, here.
- Jean over at The Artful Parent got her crew making several versions of the leaf rubbing and paint mural we did last autumn, only with lovely summer colours. Here is the first one.
- Regina at "Harmony Blog" asked me to write her a little message for the kids she was teaching at a community Lego class, to inspire them when trying the hole punching card and Lego project. She writes about the class here, and shows some of the other cool Lego projects they did as well as the hole punching, like using rubber bands and making marble mazes! Very cool!
- Dinorah and her little chap got stuck in making our Wall-E out of recycling together. I've only seen two people attempt this craft so far, and both have come out wonderfully! You can see Dinorah's version here.
If you want to see our projects that inspired these folks then I think each of the posts they have written point back to the specific projects on Filth Wizardry. I didn't want to link to our own posts in here and clutter up the whole thing with links when it's supposed to be about what others have done :)
If you have done your own version of any of our projects and would like me to link to them, or if you don't have a blog but would like to share a photo of a project from Filth Wizardry that you've done then please do let me know in the comments or email me :) I love seeing others trying our projects out, and I'm sure that seeing these other versions around the web will inspire other readers to jump in too!
One last thing...
Not really enough for it's own post, but I thought a few of you might like a heads up that OSH (Orchard Supply and Hardware) have bags of kindling for about $6 that are perfect for little builders. Just like mini planks of wood! My crew have had great fun with a bag of kindling from there this week and a box of nails. They made swords, shields, beds for carebears, some kind of weird crate and pulley device for trapping imaginary things. Lots of fun! and cheap! and reusable! Then you can pull the nails out and have a camp fire ;)


 I wasn't quite sure where we were going with this when we started out this morning. One kid was dressed as batman and the other as a princess and all they told me was they wanted to make something to play with.
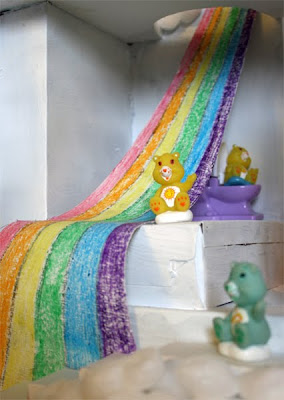
 I picked up a few Care Bear things at the local charity shop recently. A stack of early reader Care Bear books that my five year old is enjoying reading to her four year old sister, and a bag full of what I guess must be Care Bear party favour toys or something. They are just little plastic models of Care bears, but the kids have been enjoying imaginative play and reinacting the books with them, so they decided they needed a home for these little dudes. They are so cheap and nasty that the dodgy print registration on them leaves a lot of them looking in weird directions and some with totally red eyes. Freaky!
 As far as I can remember from the 1980s the Care Bears lived in some kind of rainbow mad castle type land in the sky called Care-a-lot. There were the pictures in the books to go on, but really nothing specific, so a general theme of "house made from clouds" was what we went for. I've spoken before about how much I love my $1.50 foam cutter from Daiso. It's a fab little tool that allows you to cut crazy shapes neatly out of sheets of styrofoam. My husband now knows that if there are ever any deliveries to his office with styrofoam that's going to get thrown out then he's to bring it home to me so I can play with my foam cutter!
  With this fabulous little tool I cut out a load of cloudy shapes and we hot glued them onto the box structure. I didn't really have a plan in mind, we just did one bit at a time and let it grow.


 A parcel arrive while the thing was drying, that contained a load of white styrofoam packing peanuts. Talk about good timing! So we glued a load of those on too and lastly I made a few flags with BBQ skewers to stick on.
 We set it up in the livingroom on our blue bedsheet and I got out some of my polyester soft toy stuffing for them to chuck around it.








 After the fun that the kids had with the


 I thought about getting some scrapbooking velum stuff, but that was a bit pricey, so I opted for ironing flat a load of coffee filters and letting the kids draw on them with markers and cut the drawings out. These worked surprisingly well.

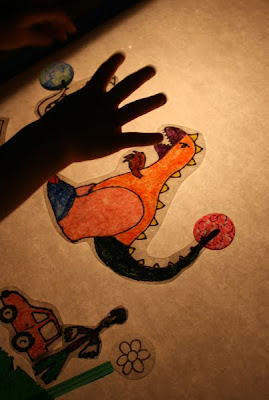


 and of course we could use the lightbox to trace things, which my five year old is quite interested in.
  We've done shadow puppet theatres before, but this seemed to get much more interest over a longer period of time from the kids, because there was so much more to the experience. Having everything down flat made it easier for them to work and being able to draw and colour characters was much more exciting than just having silhouettes, as with a traditional shadow puppet set up.