May 13, 2011

Kid's Clothing Week

Edit: Not sure if the 24 hour technical issues that Blogger had resulted in anyone getting notification of this post and then finding that it temporarily wasn't there to read, or if you tried to comment and couldn't or what. I hope that even if you managed to read this post before it went down for a while, that you'll let me know if the subject matter is something you'd like more of sporadically in the future. Sorry to the few people that did comment and then their comments also vanished. Can't help thinking that the poor people working to fix this issue over at Blogger, probably all night, must have several new grey hairs today.

I don't tend to put too much on Filth Wizardry about the stuff that I make (sew/knit/crochet) for the kids, because this blog is usually more of the stuff that we make together or they make themselves, but I did say in a post a few months back that I was thinking of posting links to some of the patterns and tutorials for things that I have had work out well for us. This week, as I'm sure a lot of you already know is Elsie Marley's "Kid's Clothing Week" for Spring 2011, so I've taken the opportunity to pull out a lot of half finished sewing projects that have been begging to be completed and thought I'd share those along with a few other bits and bobs that others might find useful if they are also into sewing/knitting and crochet for their children. I'm not sure if KCW is supposed to be purely sewing, or if the yarny stuff counts too, the yarny stuff is still clothing for the kids though right, so I'm guessing it's a legitimate part of the deal?

Right, first off, here's a few links to some kid's clothing projects we've done on here in the past that you might want to try out. I'm not a very skilled seamstress, so mostly what I do is basic or involves hacking together other garments either outgrown or from thrift stores.
  1. Superhero fleece poncho capes.
  2. Pocket Softie Skirts
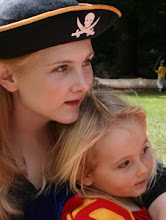
  3. Pirate girl bandana skirts (post I wrote for Alpha Mom)
  4. Tea towel skirts and a couple of years later kid decorated tea towel skirt.
  5. Post no.1, post no.2 and post no.3 on plastic bag iron on transfers
  6. Kid's princess dress from old formal wear
  7. Underpants pockets
  8. Tea towel shorts
  9. Hawaiian shirt dress hack
  10. Dress up mermaid tails
The thing I finally finished today was a strawberry shortcake outfit that I had meant to get done for my younger daughter's fifth birthday back in March. I mostly hand sew, so sometimes things take longer than they should do ;) LiEr over at Ikatbag has made a couple of really cute strawberry shortcake outfits in the past that are totally from scratch. You can see hers here and here. My little girl had her heart set on a replica of this particular version though and I'm not awesome enough with the sewing machine to accomplish that from raw material, so I hacked it together from other garments...


The way I ended up going about it was to use felt from Daiso to cover a cheap baker boy type hat that we also found in Daiso (total 5 bucks), then I found a pair of stripey socks in the dollar section in Joanne Fabric. The dress was made by applique onto a dollar store kid's tshirt that I cut off short and used a piece of tshirt material fabric that I found in the remnants at Joanne that was just big enough to squeeze six panels out of that I could sew together into the skirt and then sew it onto the tshirt to finish the dress. You can't really tell from the photo, but the skirt part is pink and red polkadotted, just the opposite way around to the one in the cartoon, but it was all I had handy. She's very pleased with it, and although the hat is a little over the top, the dress is perfectly fine to just wear out and about this summer.


She's asking for pink hair to go with it, and I can't really say no given that she's seen plenty of pictures of me with pink hair :) The kids do find this funny, but not nearly as funny as the fact that their dad, who has a shaved head, used to have dreadlocks!


Something else that I've got on the cards to finish off this week is more sewing clothing for the kids from old felted cashmere sweaters. I keep my eye out for these when I'm in the thrift stores. Usually someone has accidentally felted them and that's why they are in the thift store in the first place, other times I wait until Goodwill has it's everything for $2 sale and go see how many of them I can find. Here are a couple of pictures of a sweater I made for my younger daughter a while ago from a couple of different blue adult cashmere sweaters that had been felted and cut into pattern pieces. They are so warm and soft and snuggly! I have a pale pink felted cashmere sweater that I'm planning to make some trousers and a top out of in a 6month size for the baby to wear this winter.


Something else I've been making a few of for the new baby are sleep gowns from old tshirts. There's a great tutorial and pattern for this here on "This Mamma Makes Stuff", and I've already made the two below, but have another three cut out and ready to sew up this week (all from old batik tshirts that my husband brought back from his trips to Nepal)


As far as the crochet and knitting goes, I'm pretty new to this game. I started really having a go at it about two years ago, but really it's only been the last year that I've been able to do anything beyond a scarf or a dishcloth. The way I taught myself was basically via Youtube videos. There are so many of them out there, showing everything from the basic stitches to less heard of techniques like Norwegian Purling (which I am now a big fan of and use whenever I'm knitting ribbing) The other massive source of patterns and inspiration has been the free to join site Ravelry.com, which I signed up to in 2009 out of curiosity, but didn't have enough knitting knowledge to really get any use out of until this year. There are so many brilliant and totally free patterns available and beautifully catalogued there. It's really a marvelous site and resource! So anyway, here are a handful of the more simple projects I tried and had sucess with, plus links to the free patterns they came from in case there are any beginner knitters like me reading that want to expand the types of garments they can make without jumping in at the deep end.
Newborn bolero jacket.

This cute little teensy jacket is by Babyfatness and the free pattern is called Sweet and Lo. You can find it here. It was so quick to knit up that I want to make more! I used a bulky yarn to get a newborn size, but worsted weight would make a perfect baby doll jacket and I haven't tried it yet, but I bet sock yarn would make one that fitted a barbie doll nicely.


Easy sock pattern.

This was the pattern that I used to learn to make socks. It's a pattern for baby socks, so they knit up really quickly, but I've been able to change my yarn and needle sizes to make fluffy bed socks for my six year old or nice big stockings for the kid's for Christmas with the same pattern. The pattern is called "North Country Baby Socks" and you can find it for free here. I learned the basics of sock structure from several Youtube videos so that I could understand what the pattern was telling me to do.


Shell stitch baby hat.

The free pattern for this cute little hat was written by Betsy Thompson over at "The Dainty Daisy". Here is the link to the "Shell Stitch Beanie" pattern. She's provided it in a range of sizes and they are so quick and easy to crochet up that I've made probably about ten of them so far this year in various sizes for various children and with different alterations, like having the center of the beanie start with a flowershape or making a sunhat brim for them.


granny square slippers.

These are thanks to Purl Bee. I learned to crochet granny squares using the Purl Bee tutorial here, and then when I wanted to make something with them, but knew I didn't have the attension span to make a blanket, they published this neat tutorial showing how you could make a pair of cute pixielike slippers using 12 granny squares. By using a smallish hook and some finish yarn I was able to make a pair for my five year old. I'm about half way through a totally green pair that I'm going to put white pom poms on the toes of when I'm done, because she's tinkerbell mad.


Crochet Hexagon jacket.

This free little jacket pattern can be found over on Elisa's blog "Yarn Tails" here. It's a very nifty pattern that can be altered to any size easily and I've made three of these already this year. It's just two crochet hexagons that fold up to each make one side of the jacket. I ended up adding to the lengths of the jackets that I made from the pattern and adding a hood to the one I made for an older baby. I still have to sew buttons on the latest one that's in blue, but it's nearly done.


So, last thing to say is that today's KCW task I have is to finish sewing up the hem on the Tinkerbell skirt I've been making for the fairy fanatic of the house. Here it is nearly finished. I used part of an old bridesmaid gown that I got from Goodwill for $2, and sewed it up using the same technique as the pirate girl bandana skirts that I wrote a tutorial for over at Alpha Mom earlier this year.


Please do let me know if any of these links are useful to you, because if they are then I can write other posts now and again that cover things made for the kids and not just by them, including toys as well as clothing and link to any free patterns I've found out there on the intertoobs that have worked well for us.

May 8, 2011

Happy Mothers Day.

Well, in the US (which is where we live at the moment). I already wished my mum happy Mothers Day back in April, because my mum, dad and sister live back in the UK :) This is me with my lovely mum. I hate only getting to see her once a year now that we live so far away.


It seems a little strange to post Mothers Day craft ideas on a blog like this, given that I think most of my readers are actually mums, but I know I have at least a handful of dads that read this blog too, so maybe if you're thinking you might want a last minute gift that the kids can get involved with making today, here are a few ideas from Filth Wizardry posts of the past. I chose these ones because flowers tend to be a hit, and also because these few ideas will likely be doable with stuff you have around anyway, so no need to go out and get anything.

These are the cute drawings that my girls made for me this morning. My five year old drew our family with me looking surprised at the cake that is taller than me.

My six year old seems to think I will be getting cake, chocolate, balloons and a throne!? There had better be cake at some point in the day, because you don't go showing a woman who is 8 months pregnant multiple pictures of cake and then not give her any!

Have a lovely mum's day! :)

Apr 24, 2011

Origami Bunny Ear Headband

I know this is a little late in the game for an Easter craft, but the idea only occurred to me yesterday when we had some friends over and I was making paper planes and boats with them.  We made these headbands today for the kids that were hunting for eggs in our back yard. Very quick and easy to whip up! Thought I'd get a post up quick in case you want to make some with the kids on Easter Monday.

All you need for one pair of bunny ears are two sheets of paper, a stapler a strip of card and a little bit of elastic.

If you've been hanging out with us here for more than a year or so then you might remember a post way back about "origami for preschoolers" that I wrote. Well, in that post is a little tutorial for how to make the paper boats that we used to make these bunny ears. It's a quick little bit of origami that you can use a regular bit of A4 or letter sized piece of paper for, so you don't even need to cut paper to be square like you have to with a lot of origami.

Fold up and turn out your two sheets of paper into two little origami boats following the instructions in the "origami for preschoolers" post.

Then fold down one end of each of the boats like this.

and staple them to the strip of card you have cut out.

Then you just need to staple on your elastic at the right length for whoever is going to wear them.

Easy peasy! Some of the kids we made them for decorated theirs with markers, but I didn't get any good photos of those.

We did our slightly unusual version of an egg hunt again this year. I wrote about how we do our egg hunts in this post from last year. It's just much nicer to have the kids all working together to find everyone's eggs. They even found eggs for my friends baby, who is nearly one (we filled them with rice and other noise making stuff and hotglued them closed, so she had six different sounding rattles).

Here's the gorgeous girly with her dad, both sporting a pair of the ridiculous bunny ears (hers were made from half sheets of paper). Too cute!

Ooh and one last thing... Don't throw out any of those plastic egg bits, even if you've lost one half of them, because they make great little toadstools for fairy circles in the garden! Ancient post on that project can be found here.

Apr 22, 2011

Ukrainian egg wall decorations over at Alpha Mom

Hi peeps! I'm just posting today to let you know that I've written a post over at Alpha Mom that shows you how to make some of those lovely wax resist egg patterns you find on Ukrainian Pysanky, but on a scale more suited to preschoolers and kindergarteners. All you need are some paper, white crayons or candles, and some food colourings, so if you fancy having a go, pop over to Alpha Mom here for the whole tutorial :)

I've got some more things that I have been meaning to post here on Filth Wizardry, and hopefully I'll get to that now that the pace has slowed down and we're on spring break here. I'm at 32 weeks right now with the baby manufacturing process, so a lot of effort has gone into sorting out our veggie growing and things like that, before I'm "too big to dig". Paul's made some pretty cool stuff lately that he needs to find the time to write about on his blog too, so when he manages that I'll post a link over to his projects from here, because they are things that the kids have been involved in creating too.

Happy earth day! Kiss a worm! Actually don't, my five year old kisses enough worms for all of us ;) Blerch!

Mar 10, 2011

Fresh Orange Treat


Just a quick food post for you today. I've done a few food related posts in the past, but they are mostly just fun and aren't actually healthy in any way shape or form ;) For example the giant cookie pizzas and spaghetti hotdog freakshow. I did do a post about an orange treat a couple of years ago, but um, well, I filled an orange with Jello, so, er, not a terribly healthy treat either! Well, this time I've got a treat that is both cute, fun, and involves eating fresh fruit! It's really cheap too, because you just need half an orange for each dessert and the kids love them because they look all dinky and tea partyish.

Here's how you put them together...

Chop your orange in half, so that you get the navel parts at the bottom center of each half.

Next take one of your halfs and chop the bottom off it (keep that bottom bit to use later)

Now you will have a ring of peel that you can cut around with a knife to extract the edible part of the orange inside. This is the trickiest part and really it's not tricky at all. You just want to insert your knife at the edge of the pith and carefully rotate the orange on the chopping board to cut out it's center, leaving the peel in a complete ring.


Sit this ring with the wide side up (it's going to make the little bowl for the orange treat to sit in). Then turn the little base bit that you cut off upside down and pop it into the ring to make the bottom of the peel bowl. Now flip the edible part of the orange you cut out over so that it's widest flat surface is on the chopping board.

Cut it into six sections with your knife and pick it all up and place it into the peel bowl that you have made.

Then you get to decide how much of a treat you want it to be ;) I let my kids use a cocktail stick to eat the orange pieces because they are five and six years old, so aren't likely to hurt themselves with them, but I'd give a smaller kid a little fork. The kids like a bit of dried pineapple and a marachino cherry with theirs.

If you want to avoid the cocktail stick then a squirt of whipped cream and a cherry looks very treaty too. There must be loads of ways to dress this cute little dessert up to your own tastes :)

I don't know if your kids are anything like mine, but if my kids asked if there was dessert and I came back with "Why yes! Dessert today is half an orange!" I would be met with incredulous stares and likely be informed that half an orange wasn't a kid approved dessert, but they totally go for it when it's presented in this cute way and it only takes about 30 seconds to make each one.


I'd just like to take a moment to say that if you have emailed me recently and are waiting patiently for a response, I really am trying to get through my mail to write back to readers. We've had two birthdays and our anniversary last week and the last month has been a even more of a circus than things usually are around here. A nice and fun circus, but I'm a rather tired and pregnant ring master, so bare with me :)

Mar 6, 2011

Mardi Gras Masks from Recycling

We made some Mardi Gras masks over the weekend out of our left over craft supplies and some stuff that was in the recycling bin. If you want to read the entire tutorial then pop over to the post on Alpha Mom, here to read about it and see all the photos.


I blogged about Mardi Gras masks three years ago on Filth Wizardry. They are a great way to let the kids go beserk with the glue. The ones we made back when the kids were really little were with old airline sleep masks and white glue. If you do decide to make some and you happen to have extra cardboard and some Dollar Store crepe paper streamers handy then these dresses would really complete the Carnival look :)

If you're more of the Pancake Day type than the Mardi Gras type then here's a link to the first ever post I wrote on Filth Wizardry back in 2008, showing the pancake art the kids love so much. Now that they are older and we have mustard bottles, they are capable of making their own squiggly pancake drawings.

Crafts from the archives here that might be useful to you for St Patrick's Day are these...

Last link is to Paul's latest contraption. He made the girls a hanging rail to go above their dressing up box, out of some PVC pipe over the weekend. It's made their bedroom look a lot less like an explosion in Goodwill ;)

Feb 28, 2011

St David's day and other randomness

So far this year I've been slow on the posting front as far as the blog goes. I think it's partly tiredness what with being pregnant and all, but mostly it's because anything that I put on the blog tends to get written at night after the kids are in bed, and recently I've been making a lot of stuff myself in the evenings and that's kept me away from the computer.

I know it's not something I usually do on Filth Wizardry, but I thought maybe I would put a post together soon to share some of the things that I've been making, not because they are particularly special or unique, but more because I've been making things using patterns or tutorials that other people have been kind enough to provide for free on the web, and thought it'd be nice to point folks to the ones that have worked out well for us, in case you fancy making some of the things yourself. It's mostly sewn, crocheted and knitted items made for children. Are any of you into that?

So anyway, as the title of this post suggested...

St David's Day.

I wanted to pop in before March 1st, to remind anyone with links to Wales that it's St David's Day tomorrow! and to give you the link to the St David's day crafts that we did last year in case you wanted to have a go (leeks, hats and flags). I think this year we're going to try making some bara brith (I'd better remember to put the fruit to soak overnight). And for the first time we will have some daffodils flowering out the front of our house on March 1st, which makes me happy. I might pin one to my jacket tomorrow :)

Falcon cargo math.

Thought this might give you a giggle. Last month I found some of the awesome little wooden hundreds, tens and ones blocks at a thrift store and wanted to find a way that the kids could learn with them without realising they were doing math. We ended up spending part of the afternoon using them as cargo crates on the Millenium Falcon dollhouse that Paul made for our 6 year old's birthday. They wrote out little invoices and delivery confirmations and random messages. It was pretty darn amusing. Love how Luke ordered some Batereets (batteries) for R2D2! I reckon we should use up the remainder of the grey spray paint on them to make them more like cargo crates.

In case you are wondering where on earth you are and if this has somehow started to turn into a homeschooling blog, fear not! This went on later in the afternoon...

Lovely People.

The weekend before last I was lucky enough to be able to meet up with Kami who writes "get Your Mess On" and runs "Austin Tinkering School". She came over from Texas to California for a few days on a mission to tinker and we managed to dash into SF in just enough time to say hi before she had to truck it back to Montara with Gever Tulley's immersive tinkering workshop posse. Although it was a very brief meeting, I was so glad that we managed to say hi. I absolutely love what Kami's been doing with Austin Tinkering School and have great admiration for the energy and enthusiasm she has when it comes to facilitating children's creative dreams. Hopefully we'll get to meet up again and hang out in May when Maker Faire is on.

My six year old was very enamoured with one of the vehicles that had been made during the tinkering workshop that day, so Paul helped her sort out something similar based on her drawings and plans over the weekend. It was very sweet watching her own the project and really only wanting help with things like not being heavy enough to push down with enough force on the electric drill. She still wants to add a seat and build a ramp, but in the mean time she and her mates are just pulling each other around the backyard on it at alarming velocities. See what twenty minutes hanging out with Kami Wilt inspires you to do!

Feb 12, 2011

Giant lolly pop valentines

So, first of all, for all the Americans reading, we British call "lolly pops" what you guys call "suckers", and for all the Brits reading, in the US St Valentine's day is waaaayheyheyyyy more commercialised than back home. All the kids trade valentines treats at school, which really is kinda cute and I have to admit that I do like that it is just about love in general and not exclusively love of the romantic variety. For anyone reading in a place other than the US or UK, how does your valentines day work? and what do you call lolly pops? By the way, we also call "popsicles", "ice lollies", which for some reason makes my American friends laugh and laugh like they have been huffing gas?!


Anyway, with all that cultural intrigue behind us, I just wanted to share with you the valentines cards that we sorted out this year and last year for the kids to give to their friends. A couple of years back I saw a post on 24-7-365 showing the way they had very cleverly made some personal valentines cards of their girls holding out lolly pops. You can see them here. (warning: cute overload) I really wanted to do something like this in 2010, but this exact idea wasn't quite going to work for us for a couple of reasons.

Firstly, I wanted the girls to be able to give cards from the both of them, rather than make separate cards, and secondly I wanted to make the venture a bit cheaper to pull off, because we'd be printing them at home. The solution came in the form of a piece of white PVC plumbing pipe that we had lurking out the garage (these lengths of white plastic plumbing pipes along with their different connectors make very cool, very cheap building materials for kids to explore with, especially if you give them some bedsheets to throw over the constructions to make dens, but that's another post for another day). I just snapped a photo of the two girls holding the pipe together and then removed the background using Photoshop. If I hadn't had the ability to knock out the background with software then I would have just printed out the image at full size, cut it out with scissors and scanned it back into the computer with a white sheet of paper as the background then resized the image to fit on the postcard. The reason I removed the background on these images was to save on printer ink when printing so many copies on our home printer.


I also printed the cards on 4inch by 6inch plain index cards from Office Max, rather than using photo paper, which saved a bit too. As with the original idea, we just cut the holes and slotted in a lolly pop and it looked like the girls were holding a giant sucker, which they thought was total aceness of course.


This is the version from last year...


and this is the version from this year...


I also did one with just my older daughter for her to give to her classmates on Monday, leaving space for her to write in each classmate's name...


The text on these was from the handwriting font that my older daughter made when she was four. You can see how we did that here. I should really make an updated version!

I love how you can see the radical differences in my kid's personalities from these pictures. From the clothes they chose to wear, to the poses they struck. My older daughter is such a gorgeous little tomboy and my younger daughter is clearly dead set on being Cyndi Lauper when she grows up ;) We already knew that though. You just have to look at what they chose for Halloween costumes last year!


Just in case you have time today or tomorrow to make some valentinezy type stuff, here are a few links to older valentine's posts from Filth Wizardry that might be helpful...


Big love to you! and not just on Hallmark day either ;)

Feb 3, 2011

Guest post at Alpha Mom

Hello! I'm a bit late letting you know, but a couple of days ago I did a guest post for Alpha Mom, showing how to make some cute little valentines patches out of felt and sharpies and plastic bags. You can either use them to sew onto clothing or glue on some pins to make badges. Here's the link...

Homemade Felt Valentine Patches.


The plan is for me to attempt to have my act together enough to do a regular monthly post at Alpha Mom this year, rather than just the occasional guest post that I did last year. I'll make sure to let you know on Filth Wizardry when our projects go up on Alpha Mom, because they aren't going to be at the same time every month.


Also, good news! I've finally got my get up and go back after months of feeling like I needed to be taken to the abatoir to be made into glue! We've hit the half way mark in the human manufacturing process and we're at that awesome place where I feel capable again and I can stay awake past the kid's bed time. This means that I'll be back at the computer posting about our adventures a bit more, rather than just having the adventures during the day and then falling asleep regardless of my location at 9pm ;)

Oooh and gun hei fat choi! Congratulations and be prosperous! or as my four year old says "It's the year of the runny babbit!"